Harry Potter great hall

Harry Potter Floating Candle Decor

By Interior Decor

As a designer, I am always on home decor websites, and I often come across things that I wasn’t even looking for! I was shopping on Pottery Barn one day, and came across their “Harry Potter Floating Candle String Lights”. And, I immediately loved them and had to have them. Then, I looked at the price: $149 for a 12 pack…of just candles with a remote! Even with a trade discount, this was too rich for my blood. So, I set out to find my own supplies, and create my Harry Potter floating candle entryway.

I’ve been known to go over the top with holiday decor, my kids tell me that all the time. I have typically been the crazy Christmas lady, starting before Thanksgiving, two trees, holiday hits on a loop for 2 months….a magical wonderland. For Fall, I used to throw some pumpkins and hay on the front porch and call it a day. But, as our kids got older, they started getting into Halloween, and they took me and my husband with them. And now, my Halloween house is starting to rival my holiday home by a pretty close margin. My kids love Harry Potter books and movies, and this time of year is our favorite time to rewatch the movies. The stories, the magic, the good vs. evil. And oh gosh, the score for all the movies. Swoon, am I right?

Harry Potter Floating Candle Supplies

So off to Amazon I went, just a girl with a dream for a magical foyer, at a price that makes sense. I found a 12 pack of warm white taper candles that flicker, with remote, for $20.99. And let me tell you, the remote is clutch…no one wants to turn each and every candle on and off by hand every night, especially ceiling hung ones! I grabbed 2 packs of these, to really fill in my foyer space. You want enough to create a glow, and really, you can add as many as you want. Based on the size of my foyer, and with a budget in mind, I stuck with 24 total candles. Bonus, either remote works on all candles, from both packs, so you can save one for when one of them inevitably gets lost in a couch cushion. I grabbed fishing line to hang, 3M double sided white removable heavy duty foam tape, batteries, and black “spooky fabric” to complete my look. Total price of goods was $82.74, plus tax. Remember, the original candles were $149 for just 12, so I have doubled my candles, and gathered all other supplied needed, for just over half the price of 12 total candles. AMAZING!!!

So, I set out to create the magic. All that is needed here is a ladder, some vision, and time! I filled the candles with batteries and tied each one with fishing line. I tripled knotted the line, so they would hold really well. I hung my spooky fabric first, using a combo of some clear wall hooks I had on hand, and the double sided tape. This tape is awesome, and I chose it because it can hold a fair amount of weight. The batteries add some heft to the candles, and they will be hanging from the ceiling, and you want them to stick! My ceiling is white, and truly, you can hardly notice the squares, they blend in pretty well. I draped the fabric back and forth, loosely, just looking for texture and depth, no real pattern. Then, I started with the candles. I used varying lengths of fishing line, and just hung wherever I felt like it. All I had to do was stick the end of the fishing line between the tape and the ceiling…it could not be easier.

Side note, I actually did check all of the candles before I added fishing line and hung them. It would be a shame to hang them, and then find out you got a few that don’t work. Then, I waited for night to fall and turned them on. I love, love, LOVE how it turned out! It took me about 75 minutes from start to finish, unpacking boxes as they arrived to completion. The result is magic, a warm glow in the entry, and I know the trick or treaters are going to love it come halloween!

harry potter floating candles entryway

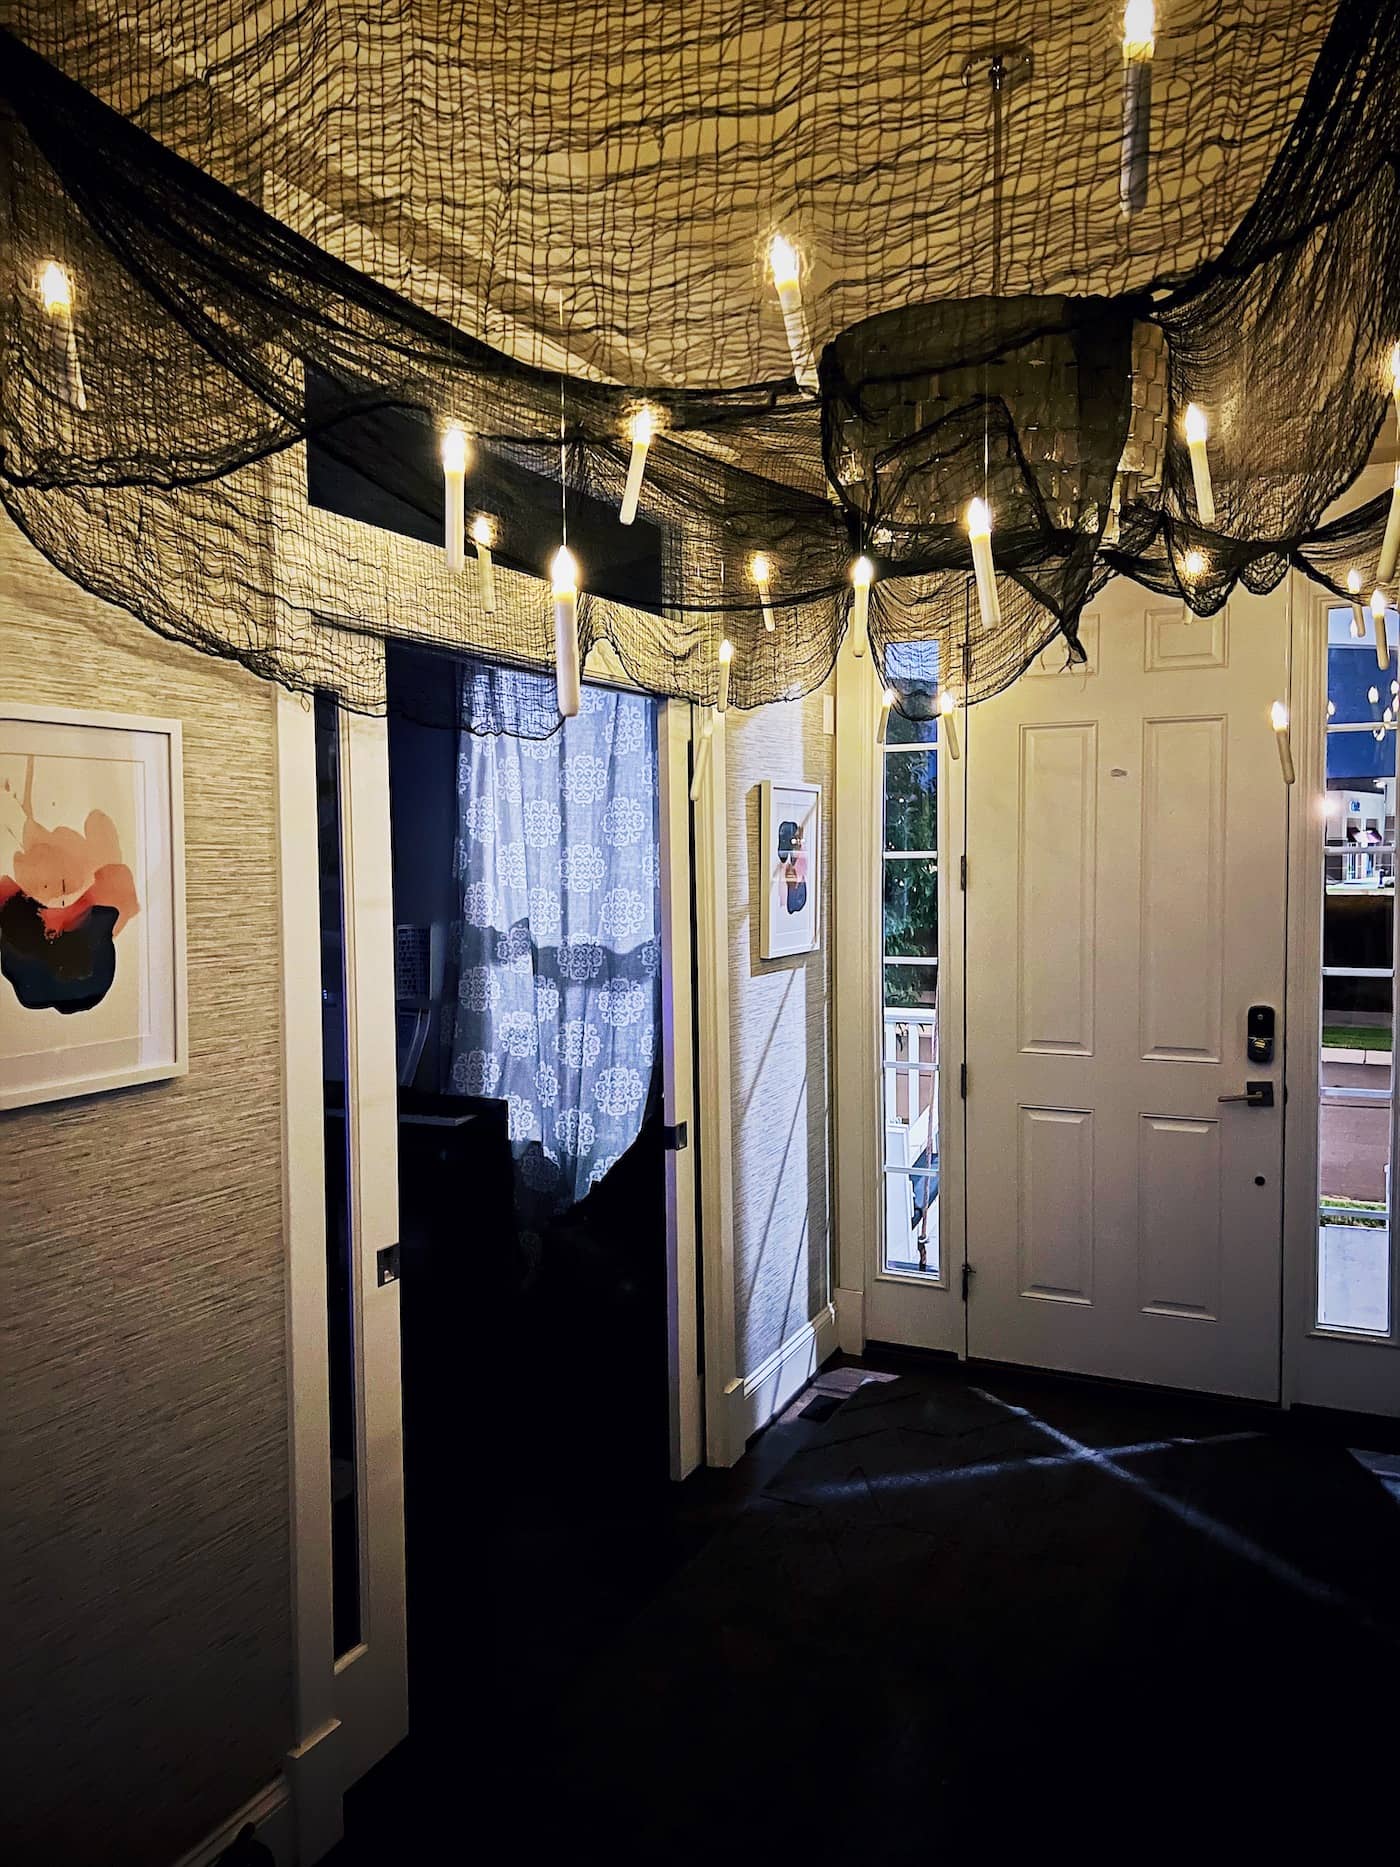
Entryway at night with Harry Potter inspired floating candles.

Creating Your Own Floating Candle Decor

Here’s everything you’ll need to create your own Harry Potter floating candle decor! I have included links to all of my purchases on Amazon to make it as easy as possible to make your own magical ceiling. I chose our foyer because the ceiling and space have delineation and it will make for a great backdrop to eager trick-or-treaters when we open the door.

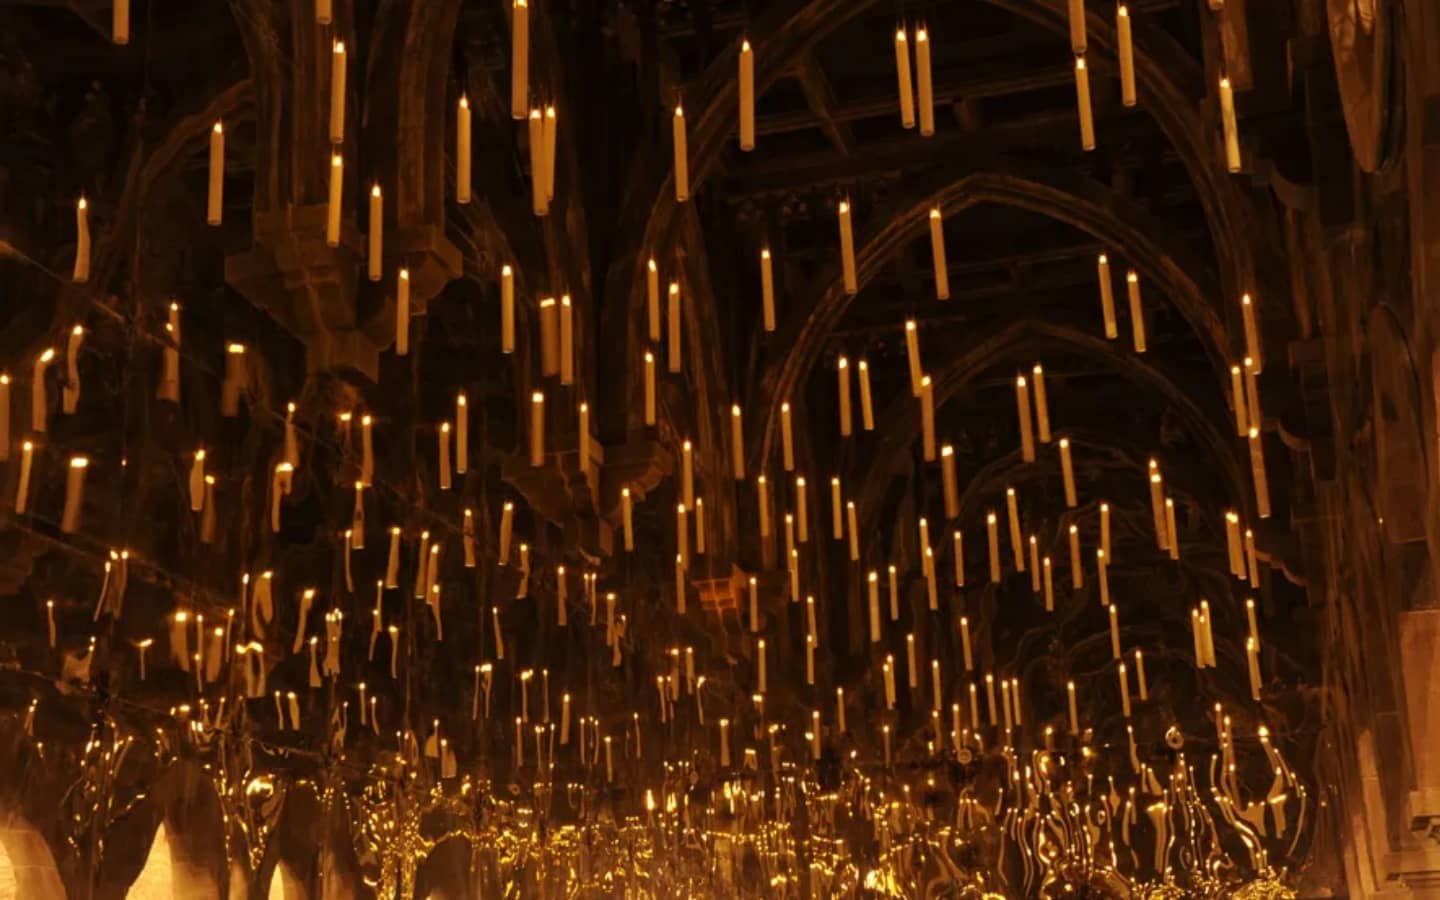
But any room would work. The dining room is another perfect place, as the great hall is what the magical ceiling was inspired by!

Note: This page may contain affiliate links that allow me to earn a commission when you click on them and make a purchase. Thanks for your support!

DLD home decor subscription

New Home Decor Subscription Service

By Interior Decor

Today I am so excited to announce a brand new way to help bring home decor to your home: Designed Life Delivered, a premium home decor subscription box service.

Starting today, you can signup for a quarterly home decor subscription service that delivers high quality home decor and accents straight to your door. Each box we deliver is professionally crafted by myself and a team of experienced designers. We curate home decor from across the country, selecting high quality items that you won’t find in big box stores.

Our boxes are delivered every 3 months, just in time to refresh your home for a new season. And each box will feature items for different rooms, ensuring your entire home gets a little TLC with each delivery. What’s more, we offer free shipping within the contiguous United States and there is no long term commitment. We’re confident you’ll love the service, but if not you can cancel any time.

I love helping people breath new life into their spaces, and running Habitat will still be a priority for me. With this new home decor subscription service, I have found a new way to help bring decor to people who need a little help with their decorating.

Many times the people that I meet simply don’t don’t have the time or resources to meet for several hours and chat about decor and design. They want an easy way to keep their homes up to date without the big time commitment. This new subscription service makes it incredibly simple to get new, exciting home decor pieces delivered every 3 months and help refresh your spaces. And because we carefully curate our decor from suppliers around the country, you can be sure you’re getting high quality items that can’t be found in stores.

Check out the new service today, and signup for your first box. I hope you you’ll love the simplicity of getting beautiful home decor delivered directly to your home!

Designed Life Delivered

Crown Moulding: Super Difficult or Quick Weekend Project?

By Interior Decor

Crown moulding is a beautiful and timeless addition to any home. Our builder puts a generous crown moulding standard in the first floor of our home. But, it stops once you head upstairs. Michael and I have a tray ceiling in our master bedroom, and have been waiting to dress it up for years. Crown moulding seemed like the perfect place to add a little pizzazz to our master bedroom.

But, crown moulding? On our own? The time, the skill required, the loud sawing (most likely during children’s nap or sleep hours), and the mess! Despite our previous experience with basic woodworking projects and home renovations, we weren’t sure this was a project that we could tackle on our own. I did price out a few carpenters in the area, and we were looking at a minimum of $1000, which is tough to justify for a master bedroom update.

Around this time I heard about a company called Focal Point. They manufacture ready to install crown moulding that is aimed for the DIYer, but at a much lower price point than traditional crown moulding. I had my doubts, but decided to check it out.

Focal Point is a ready made polyurethane product meant for easy cutting, no mitering, and a simple clip in installation. Reading about it, I learned that this is meant to be a quick weekend project. I’ll admit, it had me very intrigued. The price is MORE than reasonable, so we figured it was worth a shot!

You can check out more about the product, including installation videos, at www.focalpointproducts.com.

Here is a photo of our space before:

crown moulding master bedroom

My crown moulding arrived REALLY fast, and was packaged really efficiently: one box had all the parts we needed. We decided we wanted to go with something a little more dramatic than standard white, so we decided to paint it a high gloss charcoal gray. It comes in a matte white finish, so you don’t necessarily have to paint it. Just beware, the product required three coats of paint for a really solid look.

The best part of this kit is that it comes with wall clips. That means no nailing! You just screw the clips into the wall, about 12-18 inches apart, and make sure the clip is flush with the ceiling when you install. They don’t even have to hit studs in the wall, which makes the installation so much faster. One thing we learned was not to screw them in too tight, as it can cause them to bow in slightly and not align with the crown moulding pieces.

Also, you get plenty of clips so don’t be afraid to use them. We initially hung them every 18-24″, and found that clipping in the crown moulding sections was difficult. After we went back and added more clips at the recommended spacing of 12-18″, the crown moulding pieces clipped in much easier.

Once your clips are installed, you measure and cut the crown moulding pieces.  They are so light and easy to cut, we used a tiny straight saw. It was quiet, and they were so easy to cut. Just beware that cutting them will create a tiny amount of dust, so wear a mask and lay down a tarp or other covering to protect your floor.

You put them up, line up the clips, and snap on. It really is as easy as that! The kit comes with mid wall and corner “moulding mates”, so you can finish off the walls and corners with any mitre cuts.

Things we learned so you don’t have to:

  • Definitely use as many clips as you need. Install every 12-18 inches as suggested, because it helps the moulding clip in much easier. If you try to space them further to save time, you’ll just have to take the moulding down mid-install and add more clips anyway.
  • Don’t screw the clips in too tight. If you screw them in too tight, the indents on the moulding may not catch on the clip. Between the catch of the clip and the indent on the moulding, you really don’t have a lot of room for error.
  • Placing the moulding on the clips should be easy. You should be able to just reach up and hear a little “click”, and you’re good to go. It should not require a rubber mallet with a slipper held over the moulding to cushion the blow, though that will work in a bind 😉
  • It took my husband and I just a few hours to install, and the product really looks great. It looks like real wood moulding. I think what is great is there are so many styles and sizes to choose from as well, and it really is an easy weekend project for all skill levels.

And of course, to really finish off the space, we added a nice chandelier to help make the room feel complete. More on that later though 😉

Here’s the finished the space. We loved working with the focal point crown moulding and are thrilled with the results!

A Little Color Goes A Long Way

By Interior Decor

Within my job, I am asked to do so many things, from accessories and furniture, to appliance and materials selections.  One of the things I am tasked with most often is interior paint.  A client has either moved into a home that is not their style, or built a home that comes with stark white walls.  Whatever the situation, I pack up my paint decks, and head out for a consult.  Paint is a very personal choice, and the same tones and colors certainly don’t appeal to everyone. I make a point to steer clients in the right direction for their style and home, while keeping in mind the colors that really speak to them.  Check out one of my favorite first floor before and afters.  When we started, the previous owner had clearly loved to mix it up, color wise.  I counted seven colors that I could see from the foyer.  My ideal is to keep your home harmonious and flowing, and you can use varying colors within the same family to create a balanced and inviting look.  I had to ask my client to have faith in me in this case, because a few of the colors were outside their comfort zone, but I knew they were perfect.  The results are gorgeous, and prove a little color goes a long way. Check out the before and after photos!

Work For Pay or Work For Play?

By Habitat

Today is a great day because I have some exciting news to share: I’m finally sitting in my home office.  And let me tell you, I’m loving it.

I started my business between our coffee table and our dining table.  And sometimes with my laptop…well, in my lap.  It certainly was not the ideal background for starting a business from scratch, but hey, grab life by the horns and all that.  So, I plugged away.  I wrote blogs, created design boards, researched, shopped, designed my website (with my awesome web designer/partner in crime-Hey Mike!), from cramped and uninspiring spaces.  Our rental was lovely, but it was never our “home”, and I never got to make it feel like home, because we weren’t there very long in the grand scheme of life.

So finally, after what felt like forever; seriously, felt like forever, we moved into our home.  And I have had so much fun decorating, adding our artwork and pieces we have collected from our travels, and filling it with finishing touches that have caught my eye along the way.  It’s been such a joy to take my professional work and create a home for our family.  I took care of my son’s room first…don’t we all, and then moved on to the shared family spaces.  And finally, my office.

Oh, to have some privacy while working.  To not be surrounded by toys.  To take a phone call in a quiet and tranquil place.  When you work from home, it’s the dream.  I promise you, the dream.

And so, off we went.  I decided to go with built ins, because we plan to be here for a long long time.  So many people don’t believe me!  Mike and I have moved and moved and moved, traveled and lived all over.  No one seems to believe that we actually plan to stay put for a while….maybe in 10 years, they’ll believe us 🙂  So, yes, built ins!  We hired a simply AMAZING contractor, and with my design and his skills, off we went.

It was a slow and tedious process (well…it felt that way-it took maybe 6 total days of work).  But, it stretched out over two weeks. And when you have a toddler to entertain, being house bound for the better part of two weeks can wear on you.  I’m sure Joe (our amazing contractor!), didn’t NEED us to be home the whole time.  But, I’ve been told that I like things done my way, on my schedule, and I like to be involved.  That may be true…but I’m super nice about it, and well, things get done, don’t they?

The work and patience paid off, and I’m writing today, my first blog from a quiet, uncluttered, single use space.  And I’m thrilled.  I figure if I can start a business from my couch with a laptop and a dream…I can pretty much conquer the world from here.

Historic Home with Glam Interior

By Interior Decor

I’ve been working on a historic home in the Congress Park neighborhood for a couple of months now. This has been one of my favorite jobs to date! My work varies so much from client to client. With some clients, we just have one or two meetings, so I can help them kickstart some ideas. Other clients just want help with paint choices and a few small accessories. I love all of the work, and love to help people turn their houses into homes. But my favorite jobs of all are the total redos. Paint colors, furniture, accessories, the works. I love to take a project from start to finish, and to see how a home can transform with the right color and decor choices.

I love this Congress Park home. It’s full of historic charm, it’s warm and inviting, and the space is beautiful. While my client loves the charm, she also loves glam, she loves elegance, and she loves things that surprise people. She entertains guests often, and wants to make sure there is space for people to kick back and relax as well. She travels far and wide…and often, for work. We have been utilizing all forms of social media to stay connected, and we find that we are able to make it work.

So historic mixed with modern glam? How do we do it? How can we pull it off?

Here is a sneak peak at some of the pieces so far, and more photos will be added to the portfolio as we wrap up. It’s still a work in progress…but it’s coming together so wonderfully. I’ll be sad when this project one day comes to a close…it’s become a bit of a labor of love.

IMG_4217IMG_4216IMG_4218

Bringing It Home

By Interior Decor

One of my favorite clients of all time is my mom. Yes, that’s right. My very own mom. She has style, she has pizazz, and she loves to change her décor, as she is ever evolving herself.

Living across the country from my family is tough, and it is one of the only things I’d want to change about my life. But, here we are, Denver to Pennsylvania…and somehow we manage. So much great technology surrounds us; picture texting, facetime, social media…it’s easy enough to feel close to home. When my mom asked for some help re-decorating her bedroom, I figured, let’s do it! No way was I going to let the distance between us keep me from helping my mom transform her bedroom into that relaxing oasis that she SO deserves.

We started simple with paint. She told me the color palate she wanted, and I hustled over to Home Depot to pick up the swatch. We settled on a soft gray, a stark contrast from the brighter white and gold paint chosen many moons ago. After the walls and trim were painted, we moved on to décor. Now, my mom was looking to decorate on a budget, and it’s something that many clients request. I can certainly appreciate that, and there are so many ways to re-use pieces or find a great deal. When we started this project, my mom was set on keeping her dresser and armoire. These pieces were built way before my time, and let’s face it, they are a quality of product that we just don’t find as often in modern day furniture. But, they were brown, and faded, and dated, and they just didn’t go. I told my mom, there is no point in doing all this work if you keep the dressers as is…no can do. They will take away from everything else you are changing.

room1room2So my idea was simple, transform the pieces. Rip off those old school plastic door faces, paint the dressers black, and glam them up with some current hardware. She cannot BELIEVE the transformation. But I knew those pieces could be brought back to life…and brought into the 21st century! I am delighted that she stuck it out, put in the hard work, and saved herself a TON of money by re-using some good quality pieces that just needed a little TLC.


The rest of the room was quite simple: a chair for reading, relaxing beddingroom4room3, soft curtains, and a few pictures and candles to make the space even more warm and inviting. Voila! A beautiful bedroom, put together with elbow grease, smart décor choices and a warm but neutral color palate.

Looking at the before and after photos, I am so pleased by our collaboration. My mom has worked hard her whole life. She is my role model, and always taught me to stay strong, persevere, and live life to the fullest. One of the best lessons she ever taught me: if there is room in your closet, you have room for more shoes in your life! I’m thinking this is where my design bug came from – fashion or home décor – it’s all about style.

Small Changes, Big Impact

By Interior Decor

What I have heard most often from my clients is how overwhelmed they feel in decorating.  Where do I start?  How do I make everything work together? What will make the most impact?  What I often tell them is that small changes can have a huge impact, and you can start with one small change to drive the rest of the space.

IMG_3789Years ago, in our old home, I decided I wanted new light fixtures in our guest bath.  I didn’t like the Hollywood lights that builders are so fond of, and wanted something that reflected our style.  Lighting led to faucets, faucets led to backsplash, backsplash led to new mirrors…and if we are taking the time to do all of this…why not paint too?  You see where I’m going with this.  My point is, starting with one small change, lighting, I ended up re-decorating the whole space.  The end result was beautiful, and reflected my style.

Another project that took on a life of it’s own was when I decided that I wanted a new light fixture in IMG_3790the stairwell (if you haven’t noticed I’m really into lighting).  The stairwell was open on two sides, and had huge floor to ceiling windows viewed from the street.  I needed the light to be visually appealing when lit up at night…but to also catch your eye during the day.  I decided on an enormous hanging fixture from Ikea.  Well…once we had that hung…the white walls weren’t showing off the light like I wanted.  So…paint!  Painting 20 foot ceilings was not, and is still not, my idea of a good time.  It took a ladder borrowed from a neighbor, many stolen evenings once the wee one went to sleep, and several gallons of paint.  I finished the space off with some simple frames that I created using scrapbook paper and metal frames I found at Michael’s for $1!  And, voila!  I got the impact that I wanted. Small change, inexpensive change, big impact.

IMG_3792Our master closet was another project of mine.  I wanted a glam closet.  I wanted to walk in and say…ahhhhhh.  It all started with a chandelier.  I thought…well, if it’s glam I want, glam I will get.   A chandelier, some wallpaper, and built in shelving turned my otherwise non-descript closet into a fashion lover’s dream.

To refresh a space, even something as simple as changing out an area rug can make a huge difference. IMG_3791 Changing the color and style of an area rug can create a whole new feel to your space.  Check out our old living room, and what a big impact the new rug made.  It felt lighter, brighter, and more modern. I have since recovered all of the pillows, to further rejuvenate the space.

In the end, if you take it one piece at a time, you’ll feel less overwhelmed.  Start with one small piece that you love, and build from that.  So much of decor and design is personal style.  If you love your home and furnishings, if you feel you are reflected in the space, if you are confident and love your decor…..that makes the biggest impact of all.

Of course, if you are overwhelmed, I’m here to help you turn your home into that beautiful space you’ve always dreamed of.

Over The River And Through The Woods…

By Habitat

…To a Cabin in Beulah we go! I spent some time last weekend shopping with a client, and we had a fantastic time. She owns a cabin in Beulah, CO, and when she bought it, it came complete with a variety of furnishings, window coverings, and knick knacks. She told me that she wants to modernize the space….as is, it just isn’t her. She also doesn’t feel that it will attract as many clients as she hopes with it’s current decor.

The trick of it is, she also lives here. This is her primary home, and she rents part, or all of the cabin, to suit her guests’ needs. So, the space needs to reflect her own personal style and taste, while appealing to potential guests. What I love about her…she’s willing to take risks. She is willing to step outside of her comfort zone. She wants to hear new ideas, and create an inviting space that she would never have chosen on her own. She loves everything I’ve done so far, and that is truly a great feeling.

But, what I love most about her cabin is this quote from her online ad:

This cabin is termed “The Giving Cabin” because it is meant to give peace and rest to all who enter and 100% of the profits for the rent of this home will be going toward Murwira Children’s Home.

I think this is simply fantastic, especially during this season of giving thanks and helping others. She is renting out part of her own beautiful home, to make money to give back. I jumped at the chance to help her transform the space.

We are moving towards a warm and inviting color scheme; soft grays and creams with a pop of warm red thrown in for contrast. We’ve chosen rugs, pillows, throws and baskets. We are still working on the larger pieces, and plan to get out shopping again soon. In fact I head down to Beulah this weekend to see the space in person and continue our work. I’ve never been, but I am excited to help such an amazing person turn their home into a place of rest and tranquility, into a place that exists for the purpose of bringing good to others.

When I started this I hoped to inspire others. I had no idea how inspiring they would be for me.

The House That Habitat Built

By Interior Decor

Or is it, “The House that Built Habitat”? Around February of this year, my husband and I decided that we needed a larger space for our family. Primarily, we wanted a larger yard (read: any yard!), but wanted to stay in the Stapleton neighborhood. We love the small town within a city feel, we love that our neighbors all say hello, and we love the variety of parks and community events held here.

We found a builder that offers semi custom homes, and realizing we could design a home that suits our needs, we signed on the dotted line.

What I quickly became most excited about was the challenge of decorating our new space. I say challenge, but it doesn’t feel that way to me. It feels exciting, and truly, I’m like a kid on Christmas morning. I do a lot of DIY, and I hunt for bargains. But, let’s not kid ourselves….if you know me, you know I have champagne tastes as well. I like knowing that I can make something beautiful from nothing, and that something can transform a space. I like a mix of glam, comfort, old and new. I like to mix and match and combine things that might even feel risky to some. I want my home to reflect me and my family. And we are nothing if not risk takers and we thrive on variety and adventure.

As I wait…still waiting, for our home to turn from foundation to a full fledged home we can actually live in (believe me….it’s taking it’s sweet time!), I realized something. I needed something else to decorate. I realized what I had already known for years. Interior Decoration is my passion. It delights me, and I’m good at it! I had been helping friends and family space plan and decorate for years….I always did it for the fun and the challenge. I finally decided to turn that passion into a career….and so here I am today.

We went by the house today….we have framing! And the interior walls are taking shape. In just a few months time, I can get in there and put those finishing touches on a space that we will call home.

So, is Habitat designing and decorating our home? Or did designing and building our home provide the impetus for Habitat to begin? I’m not really sure myself. And it doesn’t really matter. What matters is, I realized my passion. It’s been a great start, and I am loving every minute of this new endeavor.

In short, I came home.