Crown moulding is a beautiful and timeless addition to any home. Our builder puts a generous crown moulding standard in the first floor of our home. But, it stops once you head upstairs. Michael and I have a tray ceiling in our master bedroom, and have been waiting to dress it up for years. Crown moulding seemed like the perfect place to add a little pizzazz to our master bedroom.
But, crown moulding? On our own? The time, the skill required, the loud sawing (most likely during children’s nap or sleep hours), and the mess! Despite our previous experience with basic woodworking projects and home renovations, we weren’t sure this was a project that we could tackle on our own. I did price out a few carpenters in the area, and we were looking at a minimum of $1000, which is tough to justify for a master bedroom update.
Around this time I heard about a company called Focal Point. They manufacture ready to install crown moulding that is aimed for the DIYer, but at a much lower price point than traditional crown moulding. I had my doubts, but decided to check it out.
Focal Point is a ready made polyurethane product meant for easy cutting, no mitering, and a simple clip in installation. Reading about it, I learned that this is meant to be a quick weekend project. I’ll admit, it had me very intrigued. The price is MORE than reasonable, so we figured it was worth a shot!
You can check out more about the product, including installation videos, at www.focalpointproducts.com.
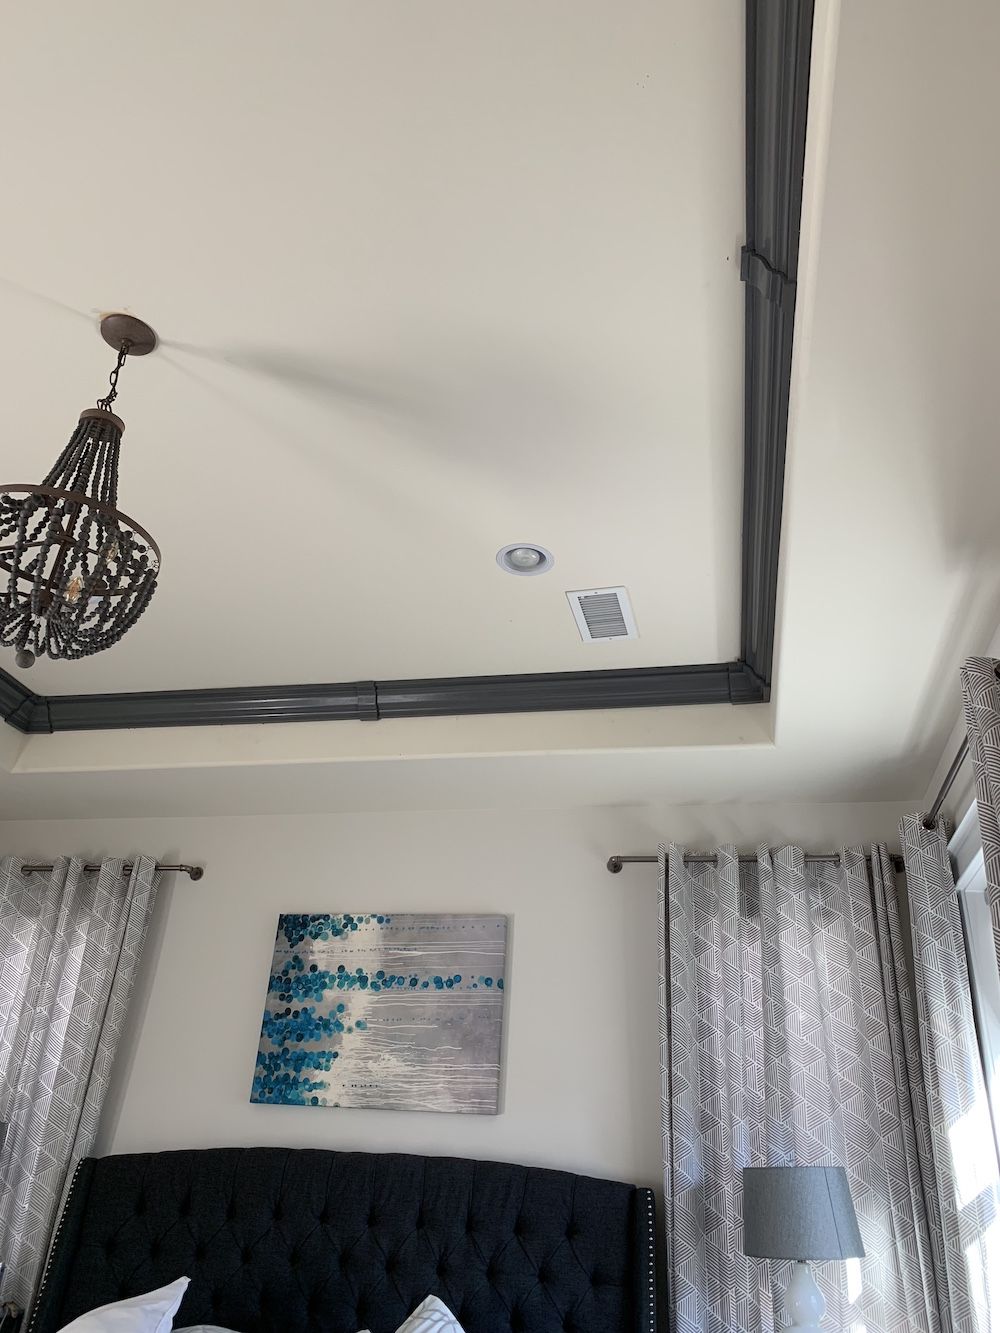
Here is a photo of our space before:
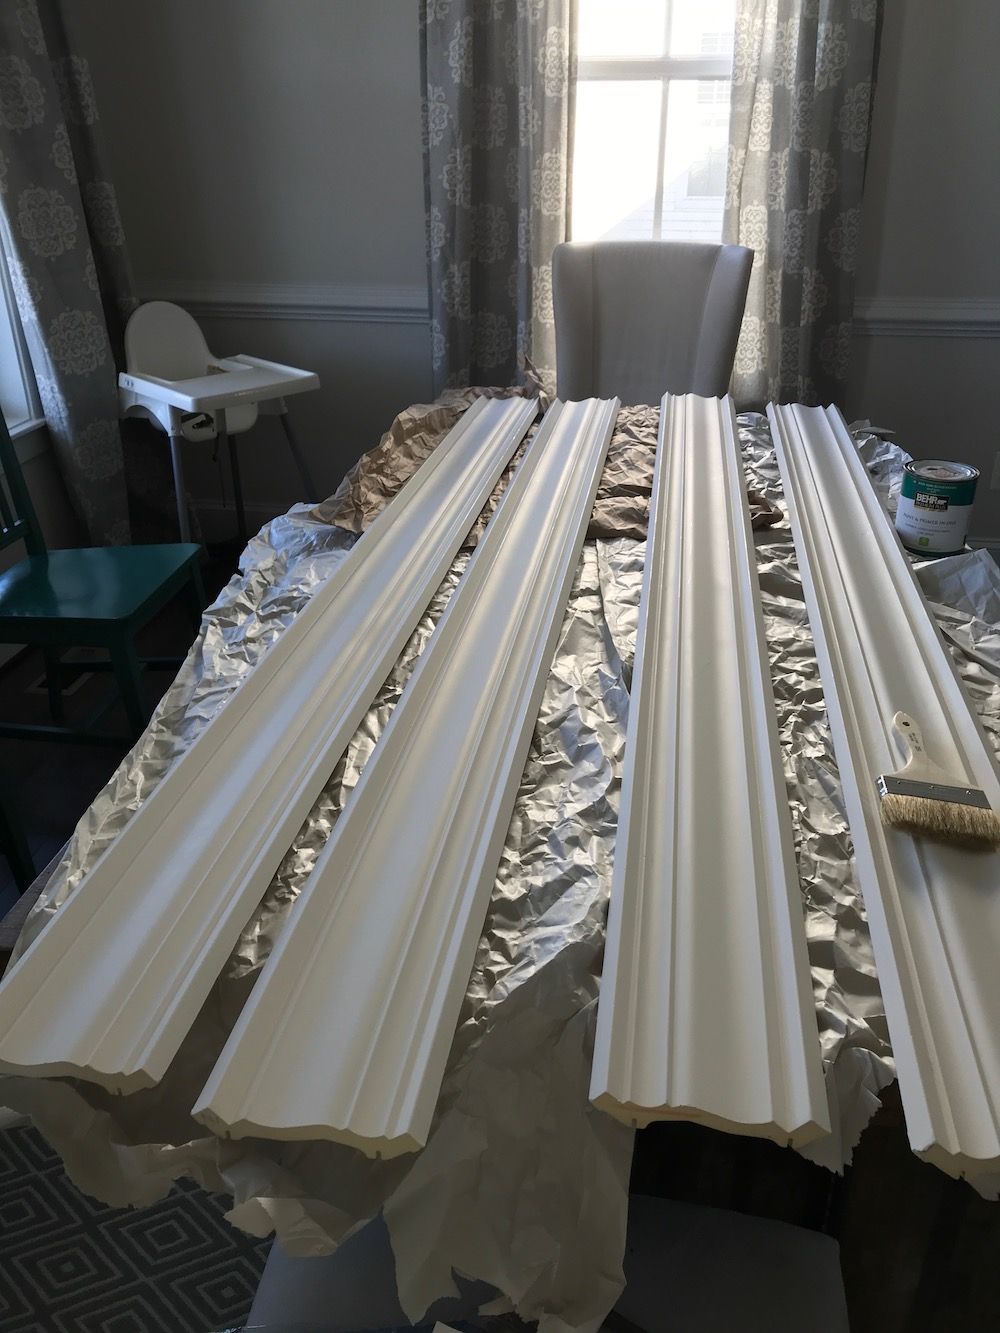
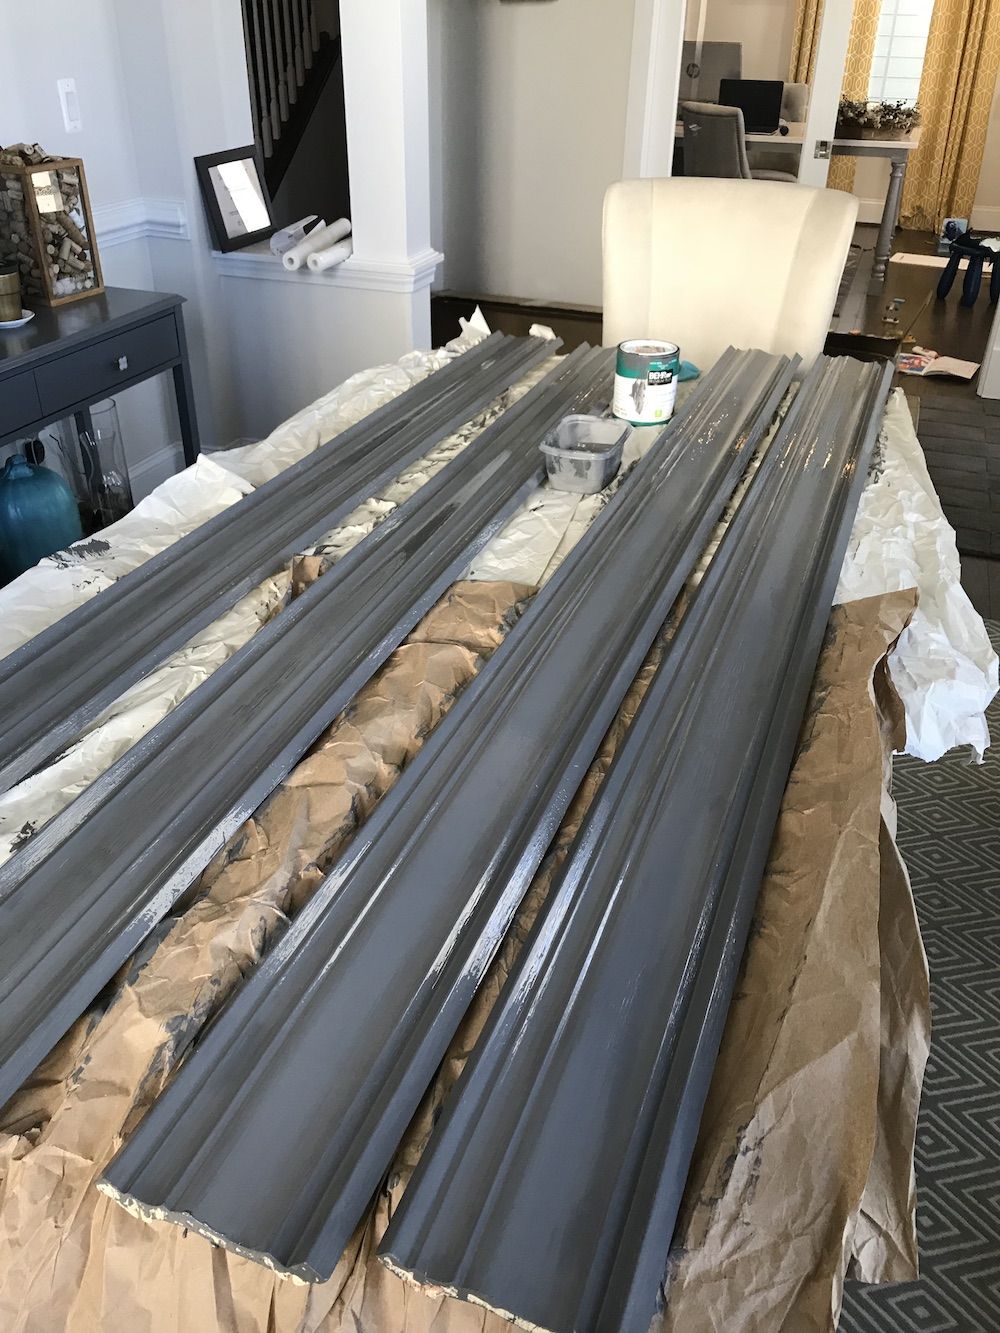
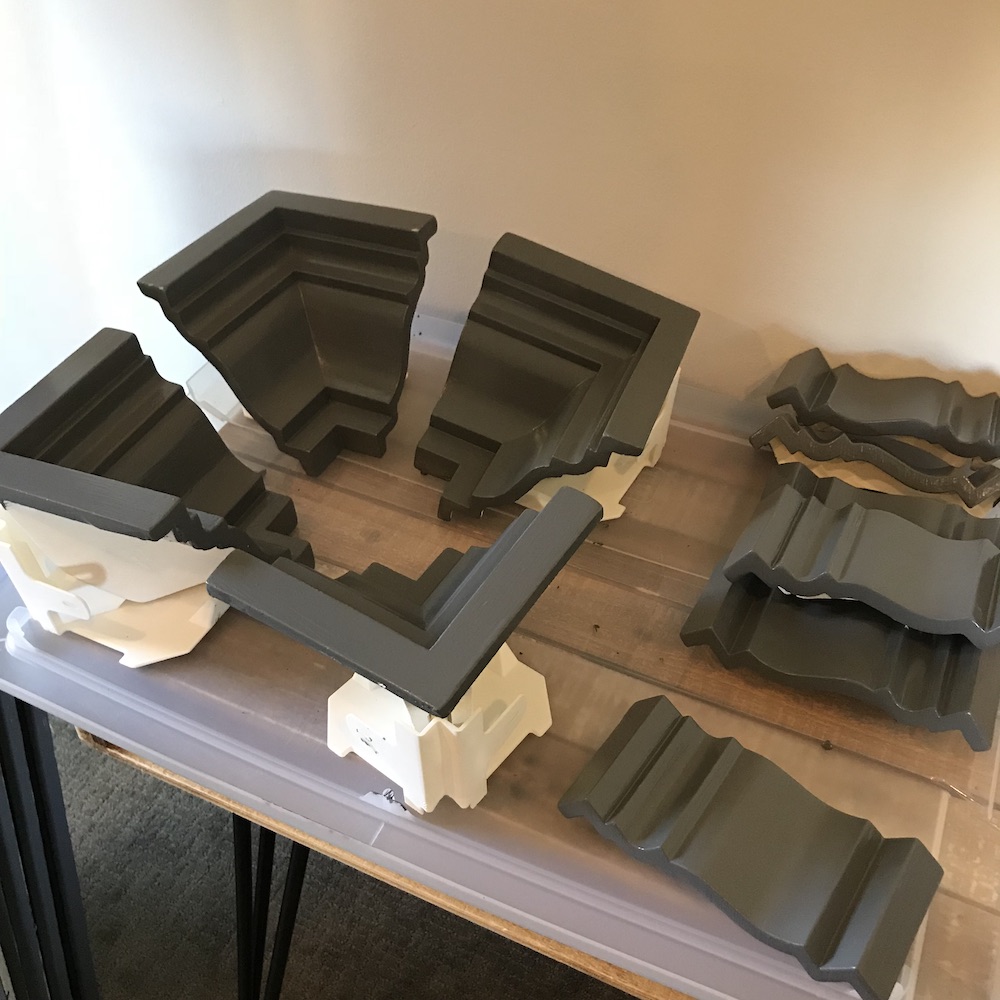
My crown moulding arrived REALLY fast, and was packaged really efficiently: one box had all the parts we needed. We decided we wanted to go with something a little more dramatic than standard white, so we decided to paint it a high gloss charcoal gray. It comes in a matte white finish, so you don’t necessarily have to paint it. Just beware, the product required three coats of paint for a really solid look.
The best part of this kit is that it comes with wall clips. That means no nailing! You just screw the clips into the wall, about 12-18 inches apart, and make sure the clip is flush with the ceiling when you install. They don’t even have to hit studs in the wall, which makes the installation so much faster. One thing we learned was not to screw them in too tight, as it can cause them to bow in slightly and not align with the crown moulding pieces.
Also, you get plenty of clips so don’t be afraid to use them. We initially hung them every 18-24″, and found that clipping in the crown moulding sections was difficult. After we went back and added more clips at the recommended spacing of 12-18″, the crown moulding pieces clipped in much easier.
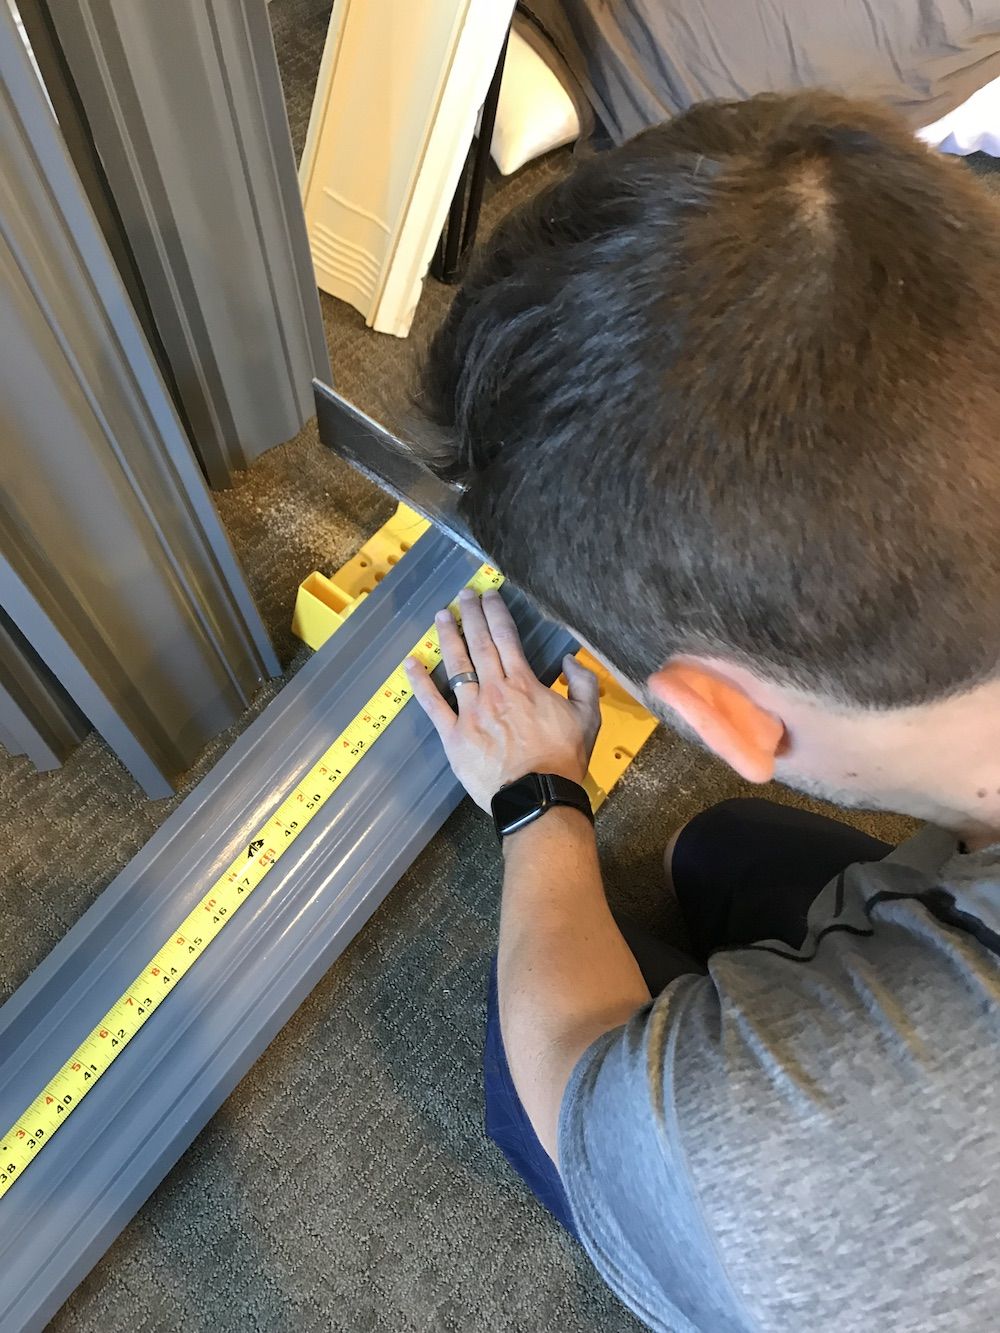
Once your clips are installed, you measure and cut the crown moulding pieces. They are so light and easy to cut, we used a tiny straight saw. It was quiet, and they were so easy to cut. Just beware that cutting them will create a tiny amount of dust, so wear a mask and lay down a tarp or other covering to protect your floor.
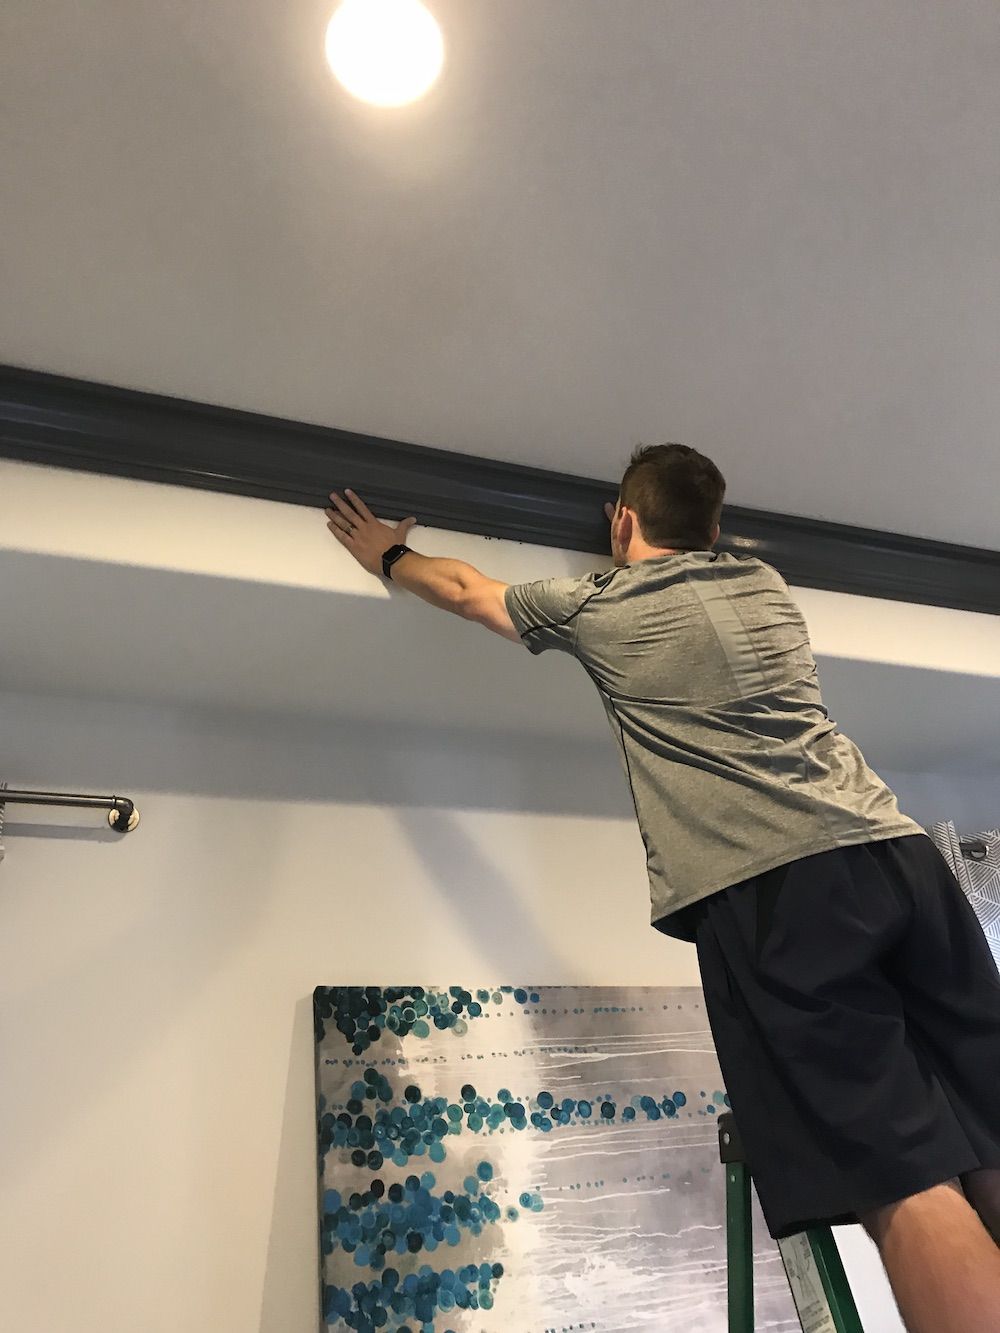
You put them up, line up the clips, and snap on. It really is as easy as that! The kit comes with mid wall and corner “moulding mates”, so you can finish off the walls and corners with any mitre cuts.
Things we learned so you don’t have to:
- Definitely use as many clips as you need. Install every 12-18 inches as suggested, because it helps the moulding clip in much easier. If you try to space them further to save time, you’ll just have to take the moulding down mid-install and add more clips anyway.
- Don’t screw the clips in too tight. If you screw them in too tight, the indents on the moulding may not catch on the clip. Between the catch of the clip and the indent on the moulding, you really don’t have a lot of room for error.
- Placing the moulding on the clips should be easy. You should be able to just reach up and hear a little “click”, and you’re good to go. It should not require a rubber mallet with a slipper held over the moulding to cushion the blow, though that will work in a bind 😉
- It took my husband and I just a few hours to install, and the product really looks great. It looks like real wood moulding. I think what is great is there are so many styles and sizes to choose from as well, and it really is an easy weekend project for all skill levels.
And of course, to really finish off the space, we added a nice chandelier to help make the room feel complete. More on that later though 😉
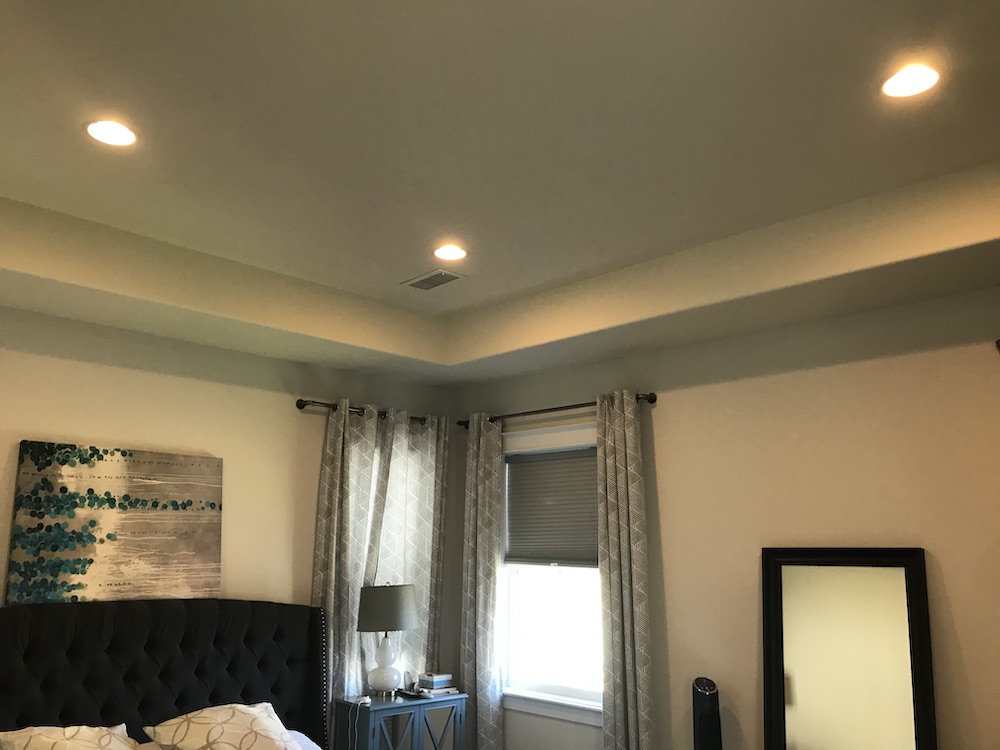
Here’s the finished the space. We loved working with the focal point crown moulding and are thrilled with the results!